Using Azure OpenAI from PowerShell [English]
Azure
As artificial intelligence (AI) continues to transform the way we work and live, more and more businesses are turning to powerful AI tools to improve their operations. One such tool is Azure OpenAI, a platform that provides access to cutting-edge AI models and technologies. While Azure OpenAI is a powerful resource, getting started with it can be daunting, especially for those who are unfamiliar with the platform.
Fortunately, PowerShell offers a straightforward and convenient way to interact with Azure OpenAI, making it easy to incorporate AI capabilities into your PowerShell scripts and workflows. In this blog post, we’ll explore how to use Azure OpenAI from PowerShell, including how to set up your environment, authenticate with the Azure API, and make requests to the OpenAI API.
This post is focusing on text completion endpoint (different endpoints are available. Here the list), similar to ChatGPT.
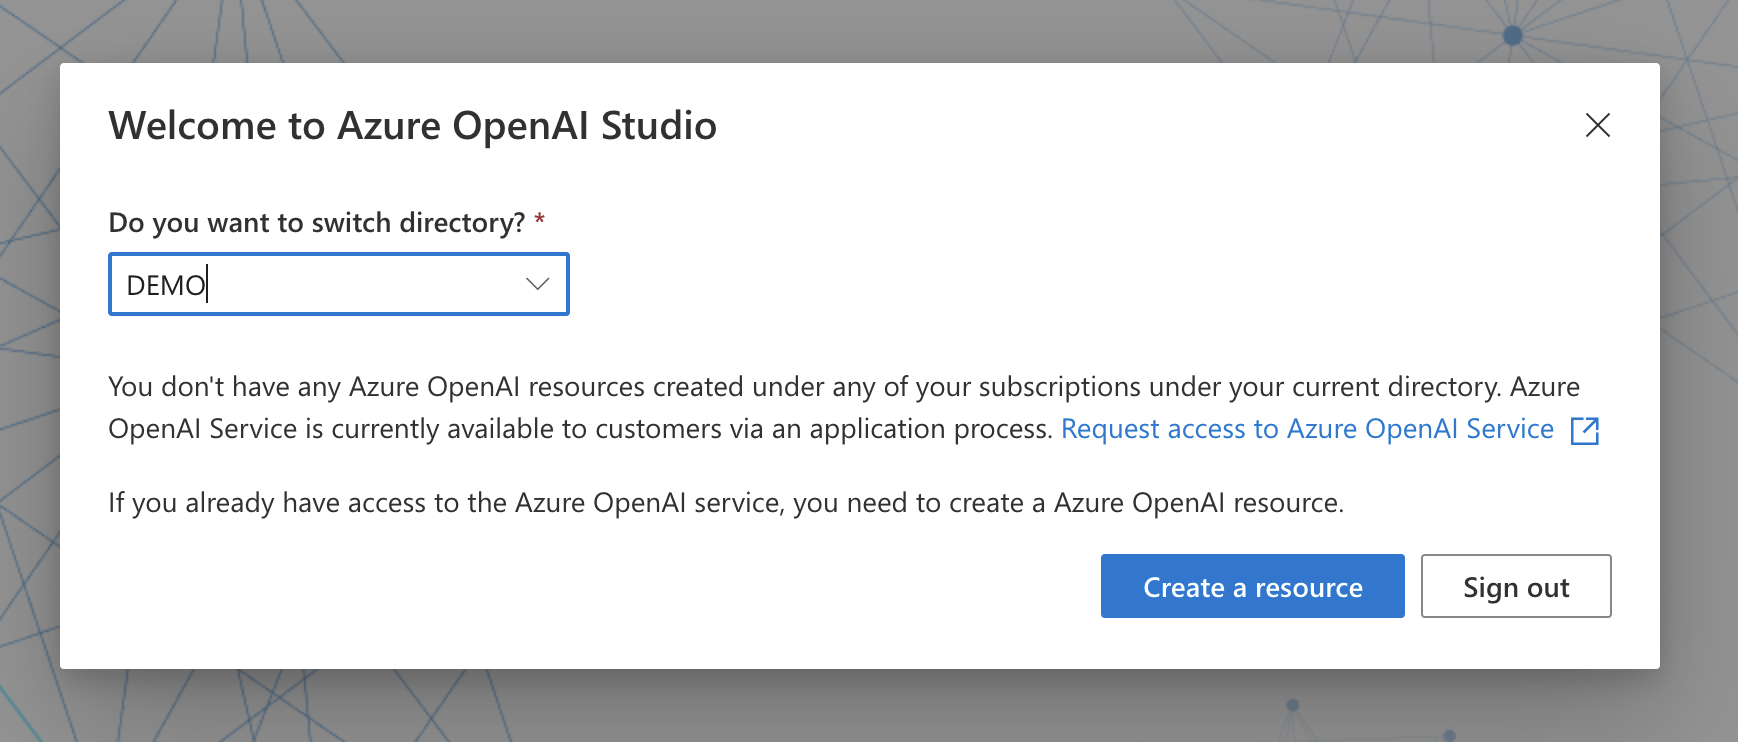
Go to https://oai.azure.com/. If you already have access to Azure OpenAI, click Create a resource.
The previous action move you to your Azure Portal and open a wizard to fill the needed fields to create the resource.
Fill out the following and click Review/Create. The name you set here, is the Resource name, and you will need it in the PowerShell script further down.
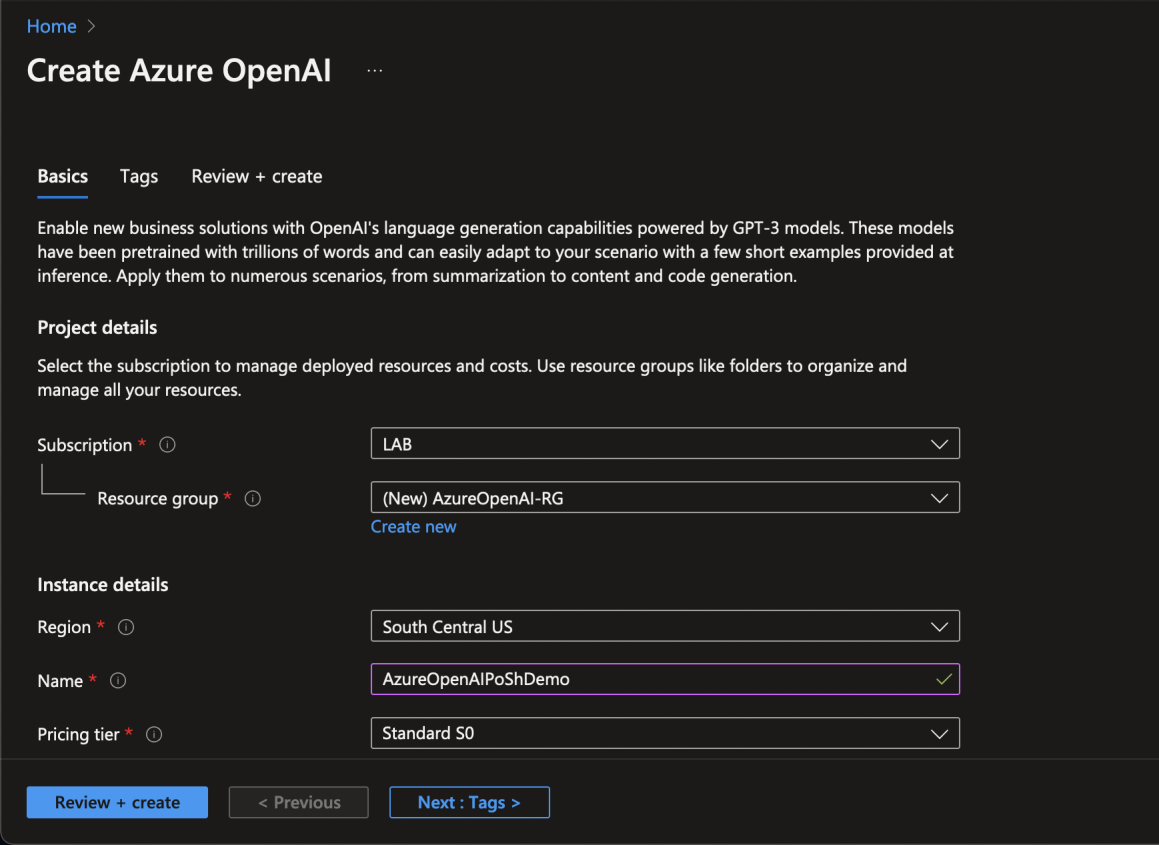
Click Create and wait while the resource is deploying on Azure.
When the process finish, click Go to resource, and then click on the Model Deployment menu.
Click Create, give it a name, select a text model, and click Save. The deployment name you set here, you will need in the PowerShell scripts further down.
API Key
To gain access to Azure OpenAI, you can verify your identity using an API Key. This is similar to how you would use a secret when working with Graph API. You have the option to use one of two keys, which makes it easier for key rotation. Additionally, it’s possible to regenerate these keys as needed.
Click on Keys and Endpoint from the Azure OpenAI selected service. Copy the Key 1 value (or Key 2, it’s the same). You need this in the next PowerShell lines.
Awesome, now you need to connect to Azure using the Az.Accounts module. Please, if you don’t have it, run Install-Module Az.Accounts and after that, Import-Module Az.Accounts.
To connect to Azure using your credentials, please run:
Connect-AzAccount

$apiKey = "XXXXXX"
$header = @{"api-key"  = $apiKey }
The last two lines, declare variables to store the key and the header to use in the next script block.
With the resource created before, please run the next block to define a new group of variables to store the resource information and the prompt to send to the OpenAI service:
$deploymentName = "AzureOpenAI-RG"
$resourceName = "AzureOpenAIPoShDemo"
$maxTokens = 100
$prompt = "What is PowerShell?"
Cool, right? The API uri use the resource group name, the deployment name and the version. The last step is join all and run the Invoke-RestMethod command to obtain the answer to your prompt:
$APIVersion = "2022-12-01"
$uri = "https://$resourceName.openai.azure.com/openai/deployments/$deploymentName/completions?api-version=$APIVersion"
$body = @"
{
"prompt": "$prompt",
"max_tokens": $maxTokens
}
"@
$request = Invoke-RestMethod -Method POST -Uri $uri -ContentType "application/json" -Body $body  -Headers $header
A little style to show the answer:
Write-Host "`nAzure OpenAI response:`n" + $Request.choices.text "`n"
And you can access to the token info (please read: (What are tokens and how to count them?)[https://help.openai.com/en/articles/4936856-what-are-tokens-and-how-to-count-them]) using the same variable but accessing to the usage property:
$Request.usageHappy scripting!